
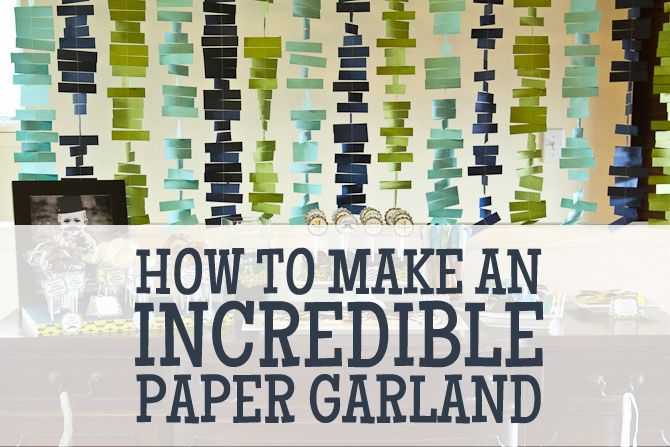

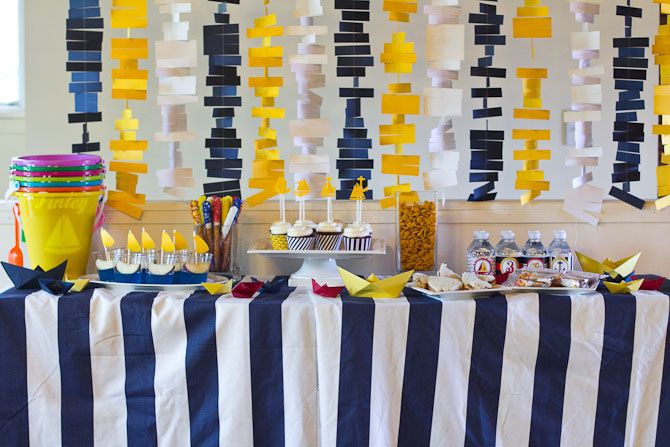
I get quite a few requests to purchase the paper garland I made for Braden's mustache bash and Finley's sailboat party--and decided it would be best to post a tutorial so that party planners can make them on their own! We don't currently sell them in the Etsy shop because of how time consuming they are, but they are pretty easy to make if you have the time to do it.

First, decide how much paper you need. Each 12x12" scrapbook page of paper will make a 3' long garland that is 3" wide. But the quickest way to find how much you need is to find the area (math alert!) of your space. Take the width (round up to the nearest foot) and multiply it by the height (round up to the nearest foot) and then buy that many pages of paper. My space was roughly 6' wide by 4' tall, so I needed 24 pages of paper.
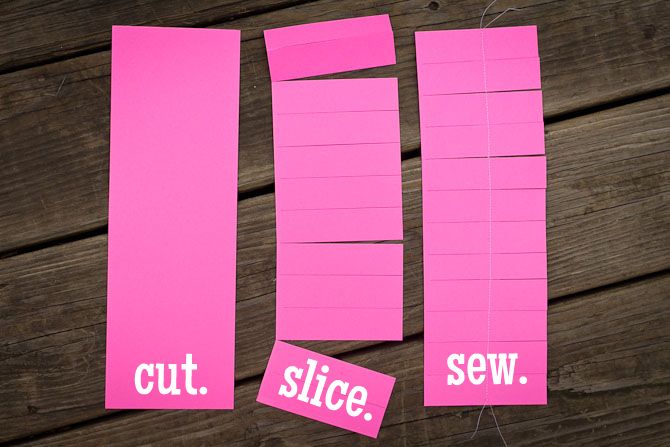
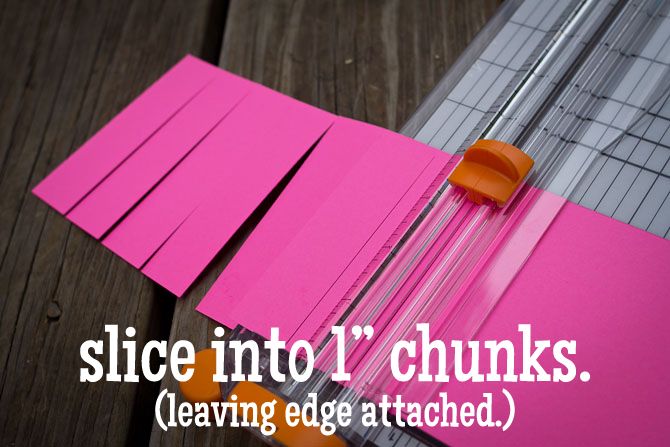
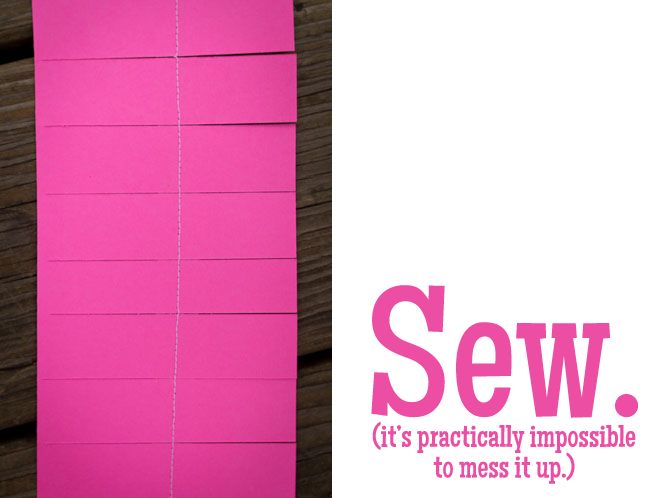
Second, cut your paper. Each page will be cut into thirds, and then each third will be sliced into 1" chunks, yielding 36 little rectangles. The BEST way to do this is to design a template on the Silhouette
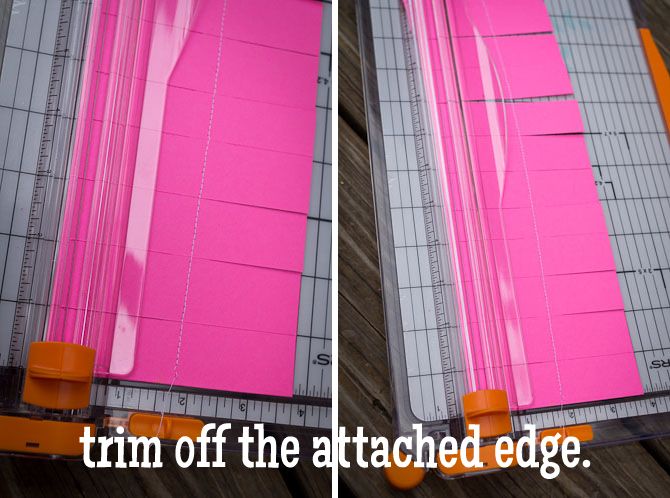
Third, sew them together! Sewing paper is easier than sewing fabric--rejoice! Use a straight stitch and sew down the middle. Make sure none of the pieces overlap, or they won't spin independently. Keep sewing strip after strip together until you are done!
Fourth, trim off the edge you left connected so that the pieces will spin.
Fifth, attach it to your ceiling and trim to the appropriate length.
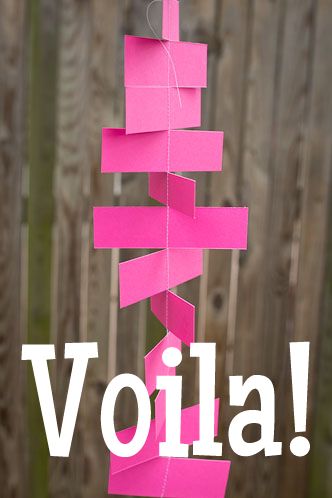
Sixth, impress your guests! And if you are anything like me, you'll leave it up for about four months because you can't bring yourself to cut it down.
Don't forget, if you need any matching party decor head over to our Etsy shop for some cute goodies!

even though I talk to you nine million times a day, I had NO idea that you don't cut all the way through. I feel smarter already.
ReplyDeleteI've been following you for awhile and want to THANK YOU SO MUCH for posting about this! My son's birthday party is next weekend and I was either going to do this or the circle garland but this looks cuter and easier to sew. Thanks for the tip on not cutting through until you are done sewing - what a time saver!
ReplyDeleteJust "sew" you know (ha ha ha, I'm funny) -- I pinned this.
ReplyDeleteI have been hoping you would post about this!! Thanks!
ReplyDeletehahaha by now you should have been able to have it removed, still it is adorable!!! I liked it a lot, thanks!
ReplyDeleteJuani
Can you tell me how easily tangled it gets? I am planning on making it for a party, but I'll have to take it to the venue. Any suggestions on getting it there as intact as possible?
ReplyDeleteIt gets pretty tangled! The best way to transport it is to wrap it around cardboard or card stock to try to keep it from wiggling around.
DeleteHi there,
ReplyDeleteCan you tell me how you attached to your ceiling? Thank you!
Staple Gun! It's a wood ceiling.
Delete